Sienci Longmill MK2 48x30
In this article I’ll try to cover my experience with this machine.
TL;DR; Wow ! It is so Awesome !
Introduction
I have been using low-end CNCs (low-end spindle as well) and a 3D printer for couple of years now, and everytime it is buggy (or even broken) and when it goes well it is quite slow.
I’ve been planning this for a long time. (maybe 2 years now) Watching a bunch of youtube videos, reviews, projects made with, and etc. I was unable to decide what size, what machine, even Lasers !
So let’s go in this adventure !
Why ?
- Bigger is better 🤷♂️, nah seriously … I have the space and I learned from my various ideas and just stuff that I want to try that 48x30 is the best fit (also it can do larger sheet, using the proper software and etc. didn’t try so I can’t write about it.)
- My usual workflow is : Buy a 24inx48in MDF 1/4in; Drop it directly on the wasteboard and have fun. So quick and easy !
- Also the working area is bigger than 48x30, it is actually: 50-1/4in x 34in
- It supports a makita router
- Inductive sensors (I had experience with those and for me this is a must. Physical and software limits is a must !)
- Performance and Build
- Aluminium
- Screw driven axis
- There is people standing up, or sitting on the machine while it operates !!!
- Strong and solid Z axis (no more rambling !)
- Accessories (such as dust shoes, auto zero touch, bunch of bits and so on)
- They are located in Canada ! So I can order pieces with a reasonable delay without hidden fees, extra taxes or just lost boxes over seas and don’t know what else.
- Great documentation ! Great videos on youtube official channel and other youtubers that share their experiences
- The price, it is in CAD !
- It has the scalability, durability and stability to bring joy in my experimentation and projects, I’m only a hobbyist !
- Oh !! It supports a laser module AND a rotary module ! No need to struggle searching the web for third party / good-ish companies… or having a second machine that cannot be that big for few dollars…
- Open source and schematic are well documented (see below why I needed that)
- I can order parts !
- There is also other whys, but as for now I forgot them :/
Part One
I’ll go quick…
The assembly
Took me few hours (First time in my life that I assemble something like that)
It is quite different than Ikea or Lego project… But honestly I was mindblown from the beginning, I was so happy and intrigued about everything that at the end it is worth to know what is what and what is where !
I followed 90% of the video published on youtube, and 10% of the documentation. I took my time and patience…
For the 10%, it was mainly in regards of the:
- Delrin V-Wheels (Eccentric nuts stuff… oh damn I needed all my patience for those.)
- Delrin Anti Backlash Block (the small ones (T8) and the big one (T12), mainly the big one caused my trouble, see below…)
While unboxing, be sure to open all boxes, I know there is some that are filled with air. But the lead screws are quite well hidden.
The adjustment
I’ll skip for now the table part. But to do the adjustment you must have built and setup everything on the final table (or surface)
I’ll say, it is quite hard… It took me few hours over few days to figure that one out… I was about to contact the support to get guidance to see if there was something wrong with my setup.
First thing. Everything must be leveled … Otherwise forget it. I was all god for that one.
I won’t go into any details about how to do anything, because the documentation and youtube videos are already mentioning what and how to do that. So my advise: Read the documentation carefuly and you will save a bunch of hours !
Maybe some points to verify before going nuts…
The delrin V-Wheel, in the documentation it is well explained how to adjust the eccentric nuts to get the perfect balance, otherwise it might block and produce vibration and other weird stuff.
The delrin Anti backlash T12… this one … Oh my ! I struggle only on that one for way too much time… I tried screwing the small adjustment screw, then using small iteration (1/64in, 1/32in) unscrew it and manually turning the leading screw, You will feel it while doing, but I had a little “bump-ish”, it was kinda weird…
So I gave it a try (I was still excited to try that superb machine !) I went wrong :/
Using the default settings with gSender it worked for not long… the X axis has stopped and somehow it was blocking during fast movement (I think it was around 4000mm/min, I dropped that parameter to 3000mm/min, and still today it is set to 3000mm, the Y axis has no issue at 4000mm/min)
So I went back in the documentation, I put more tension on the X lead screw, reduced the movement speed to 3000mm/min played with the delrin v-wheel… and still randomly it stopped working…
But this time I noticed that it probablu was (I am far from being expert in this matter !) the v-wheel and the backlash. Both of them were stiff at certain point on the X lead screw…
So the final attempt, (and strangely worked…) was to go back to the basicw, I moved the head to the left, Adjusted everything, move it manually maybe 100 / 200mm to the right, double checked everything (and focusing on the little bump while turning the nut on the right side) and if it wasn’t perfect I played with the v-wheel to match the expected tension, and did the same for the backlash, I repeated that till it was smooth from the left to the right… It took a while but the result is great ! After doing that the noise and vibration greatly reduced (I still have some noises but next time I clean everything I will try to optimize…)
The wasteboard
Classic 3/4in MDF Sheet, I cut a full 4’x8’ to have a perfect fit and a small fit, I’m currently using the smaller fit (I don’t know why, I planned to test some stuff and it worked…)
I used the default surface leveling including in gSender, yet again watch the official video to know how to do that, the video is quick and it has all the necessary information to do it correctly.
I ordered the surfacing bit with the machine and it worked perfectly
Last thing, MDF and dust … Good luck ! wear a mask, (goggles for any breaking part going in the air), and a dust collector is a must ! (see below for my cheapy setup)
Clamping System
Using a Dovetail track system (made using the CNC itself with a dovetail router bit and a downcut endmill to create the circular holes) So far I did not have issues with this system, I’ve done all my project using this workflow.
I also have the clamping parts and the dovetail track nut available on my etsy page:
The table
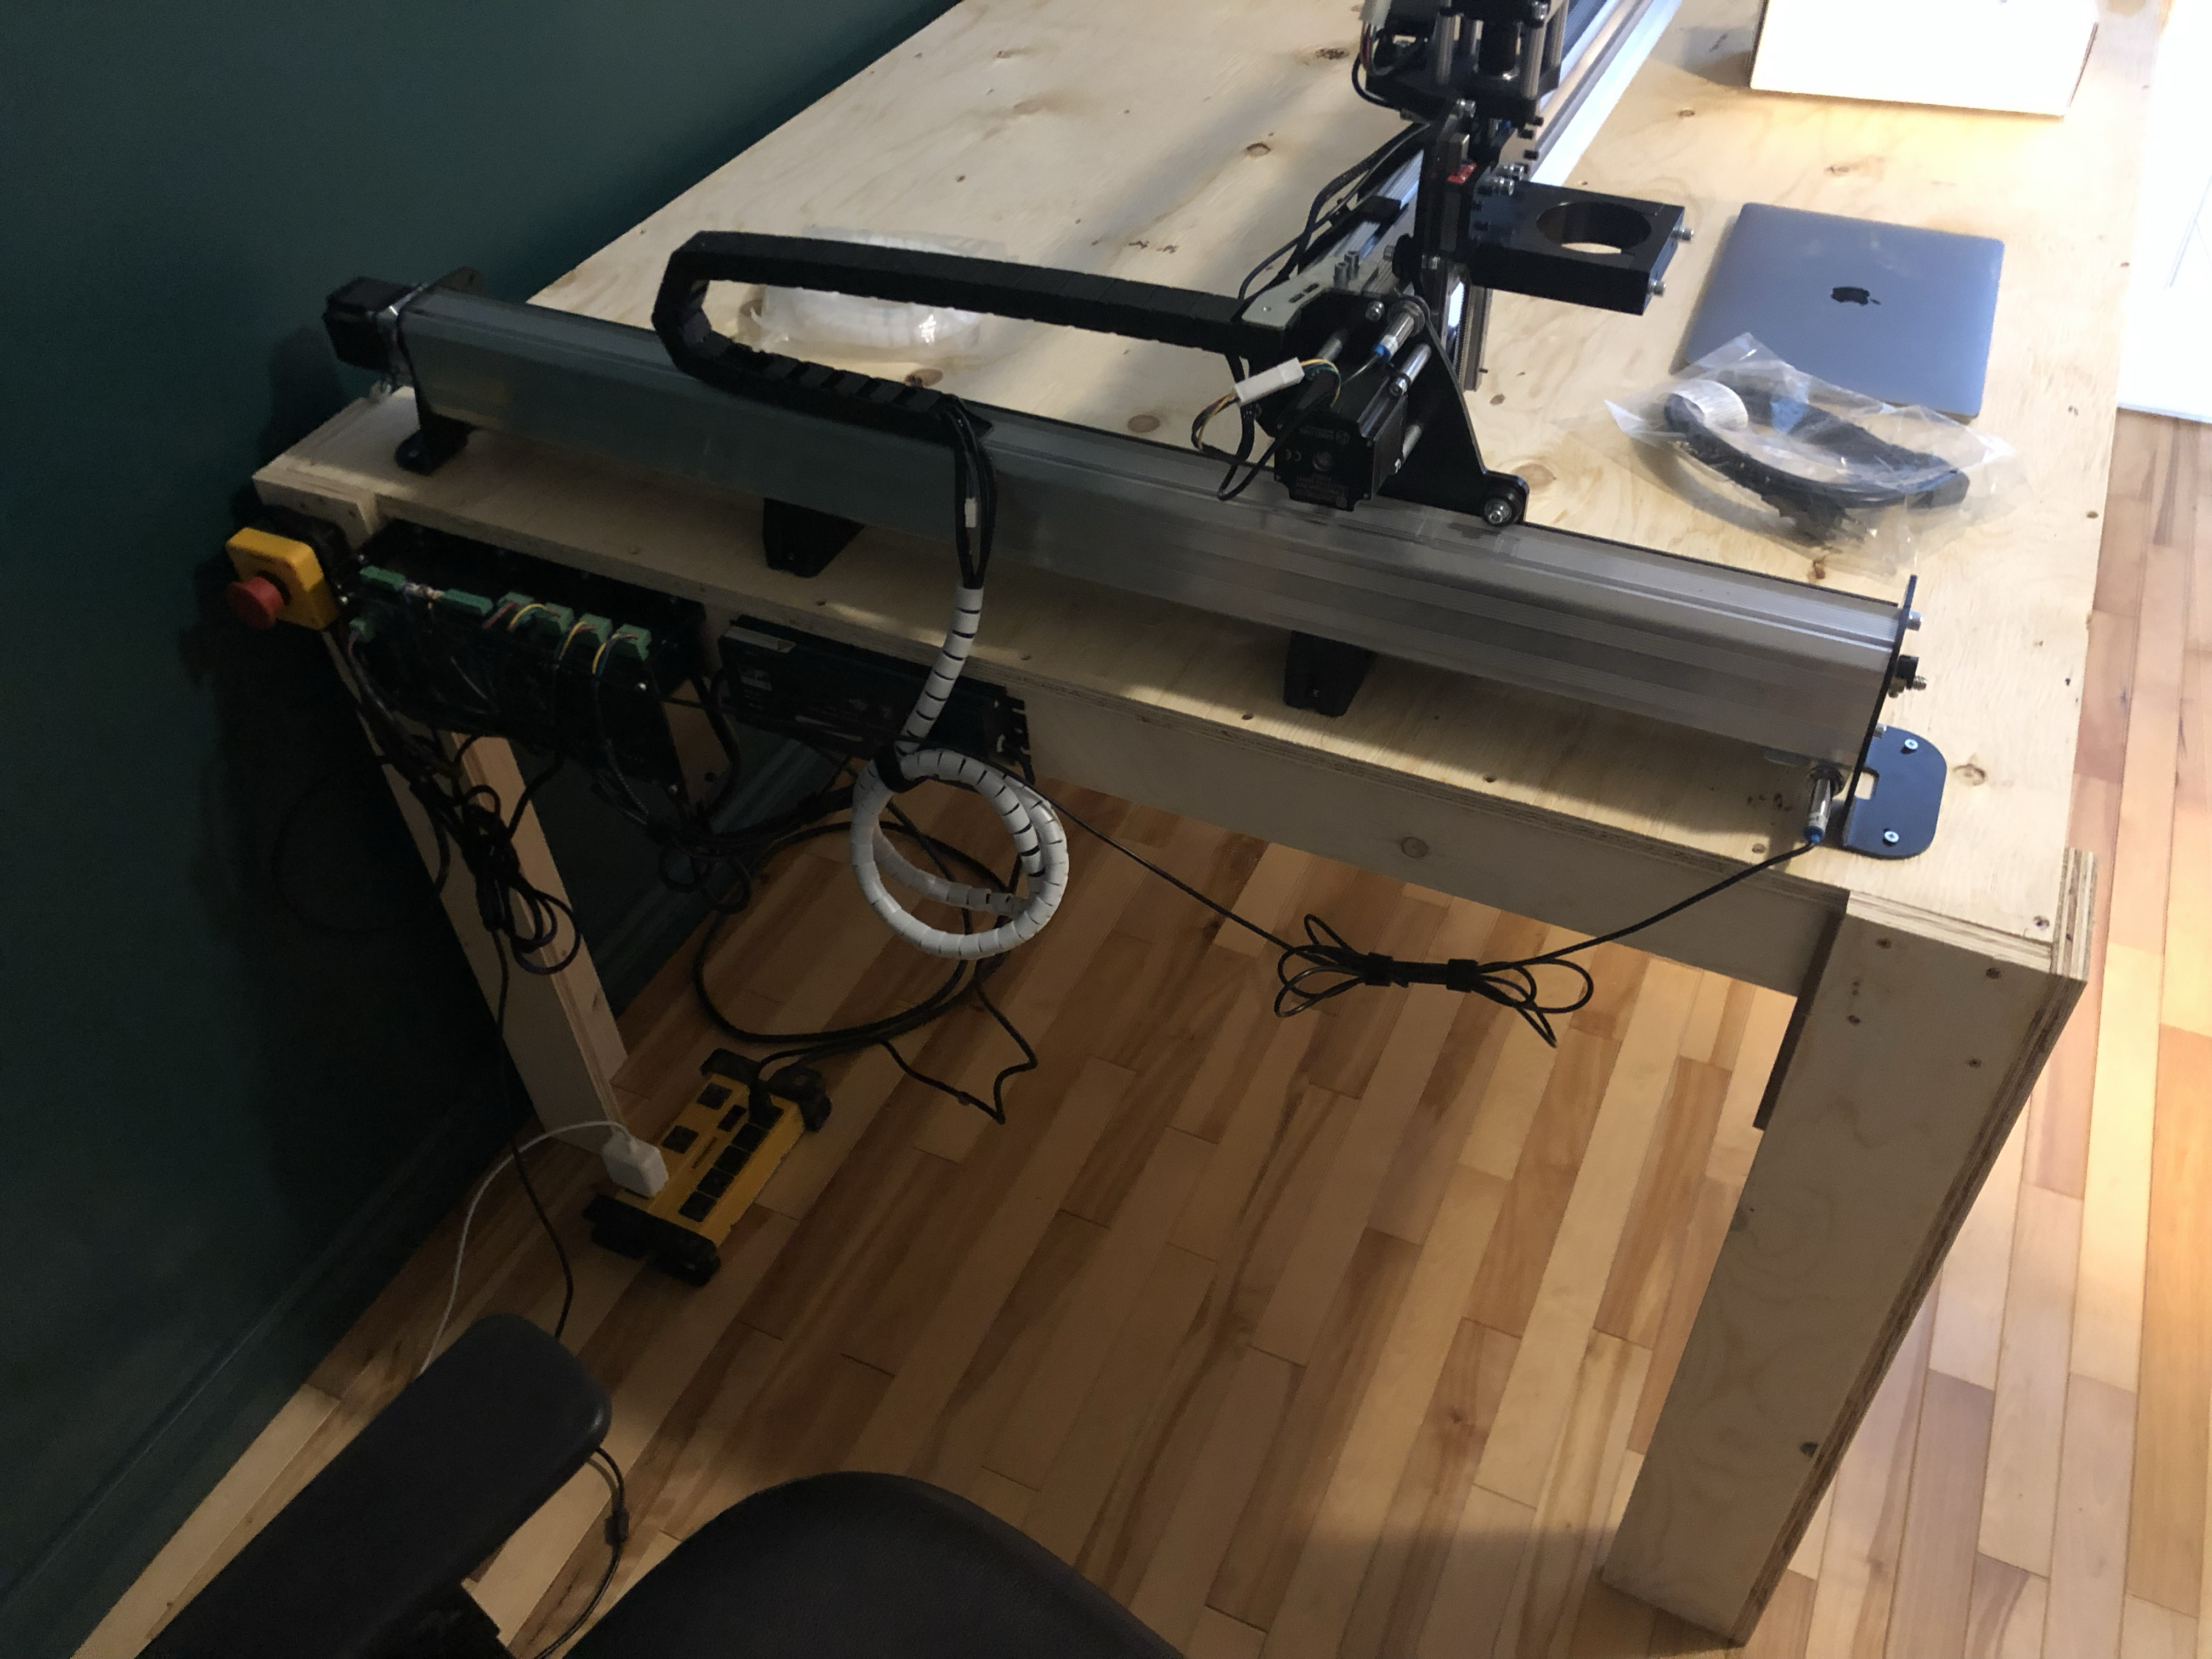
I opt for a full Plywood 3/4in table. Currently it is built with a simple top, 4 legs and few supports under as well.
Nothing fancy.
Pictures
Part 2
Electrical and cable management
This one is tricky, I ain’t good with cable management, so follow the documentation to fill the drag chains properly.
Other than that I ordered from my local store a 110V extension. I only have one router. So I need to be able to remove it from the machine. The extension cord is going through the chain and the router is connected.
The result is : the cable management needs a manager… But there is none.
Lighting
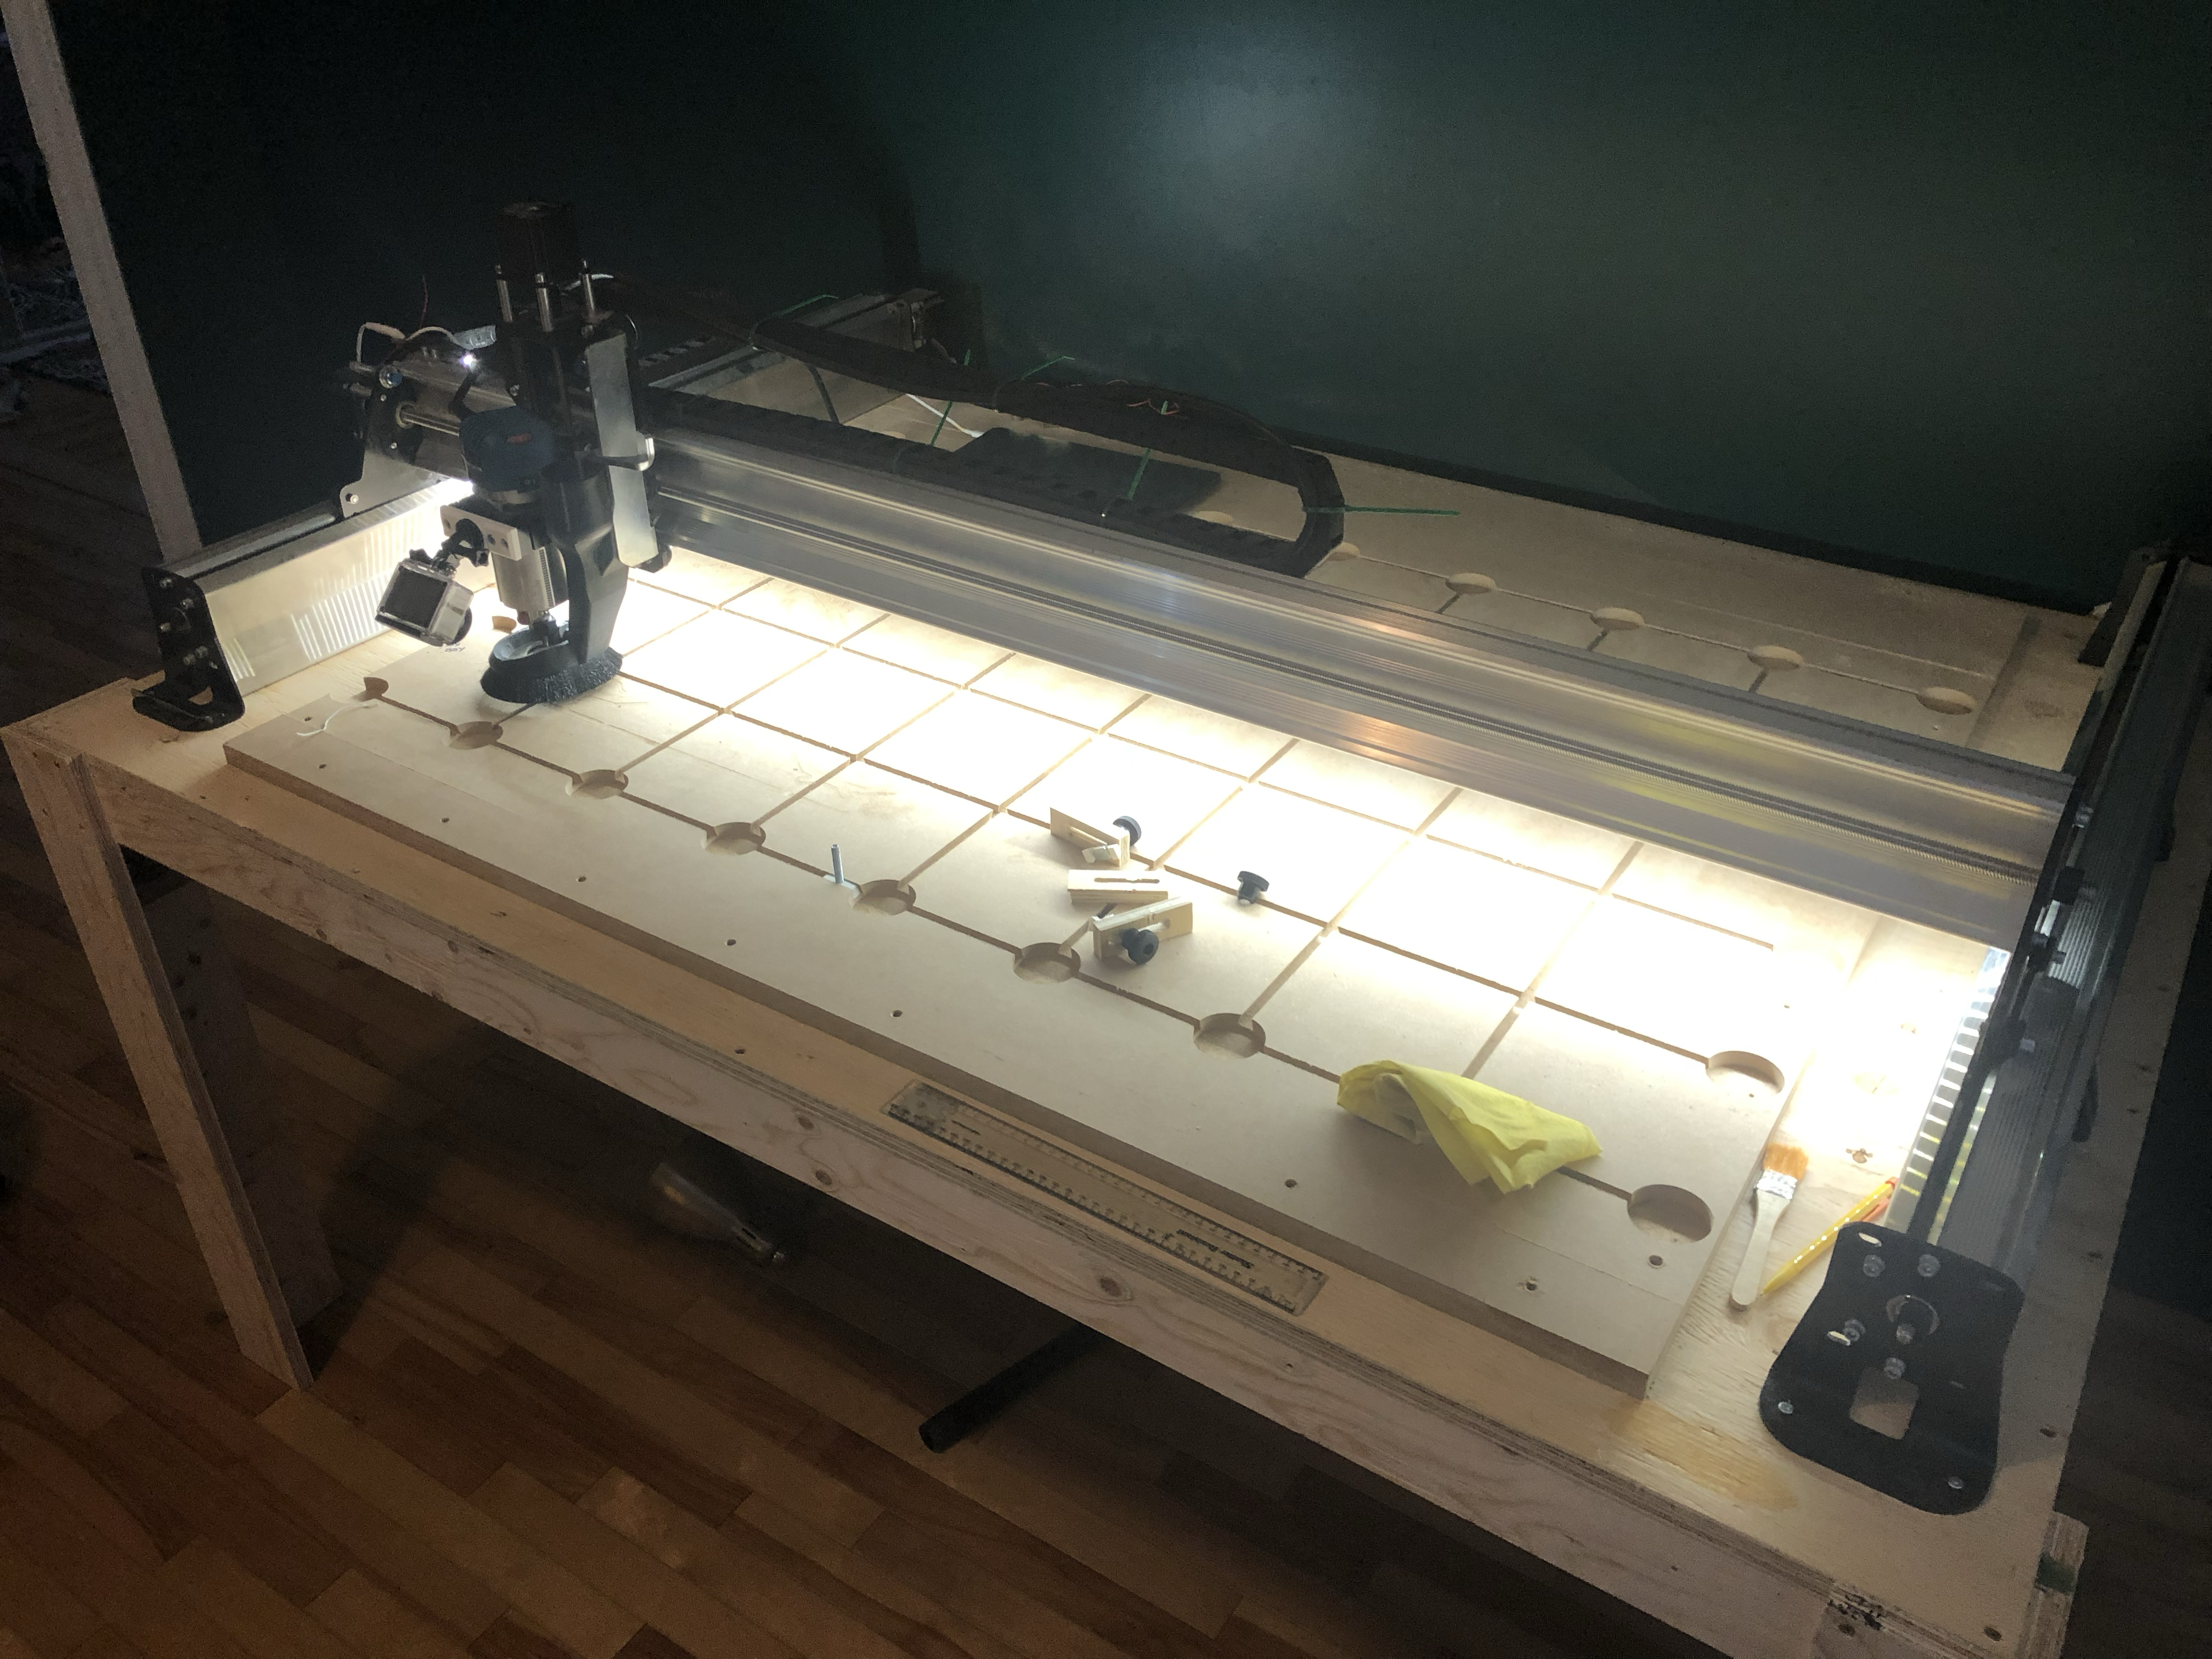
This one was a massive issue, I was unable to see what I was doing.
So the quick fix, a cheap (yup amazon stuff again…) LED cabinet lights, it was available in 4 pieces of 20inch so I used 3 of them and stick them under the X axis, and now it is perfect !
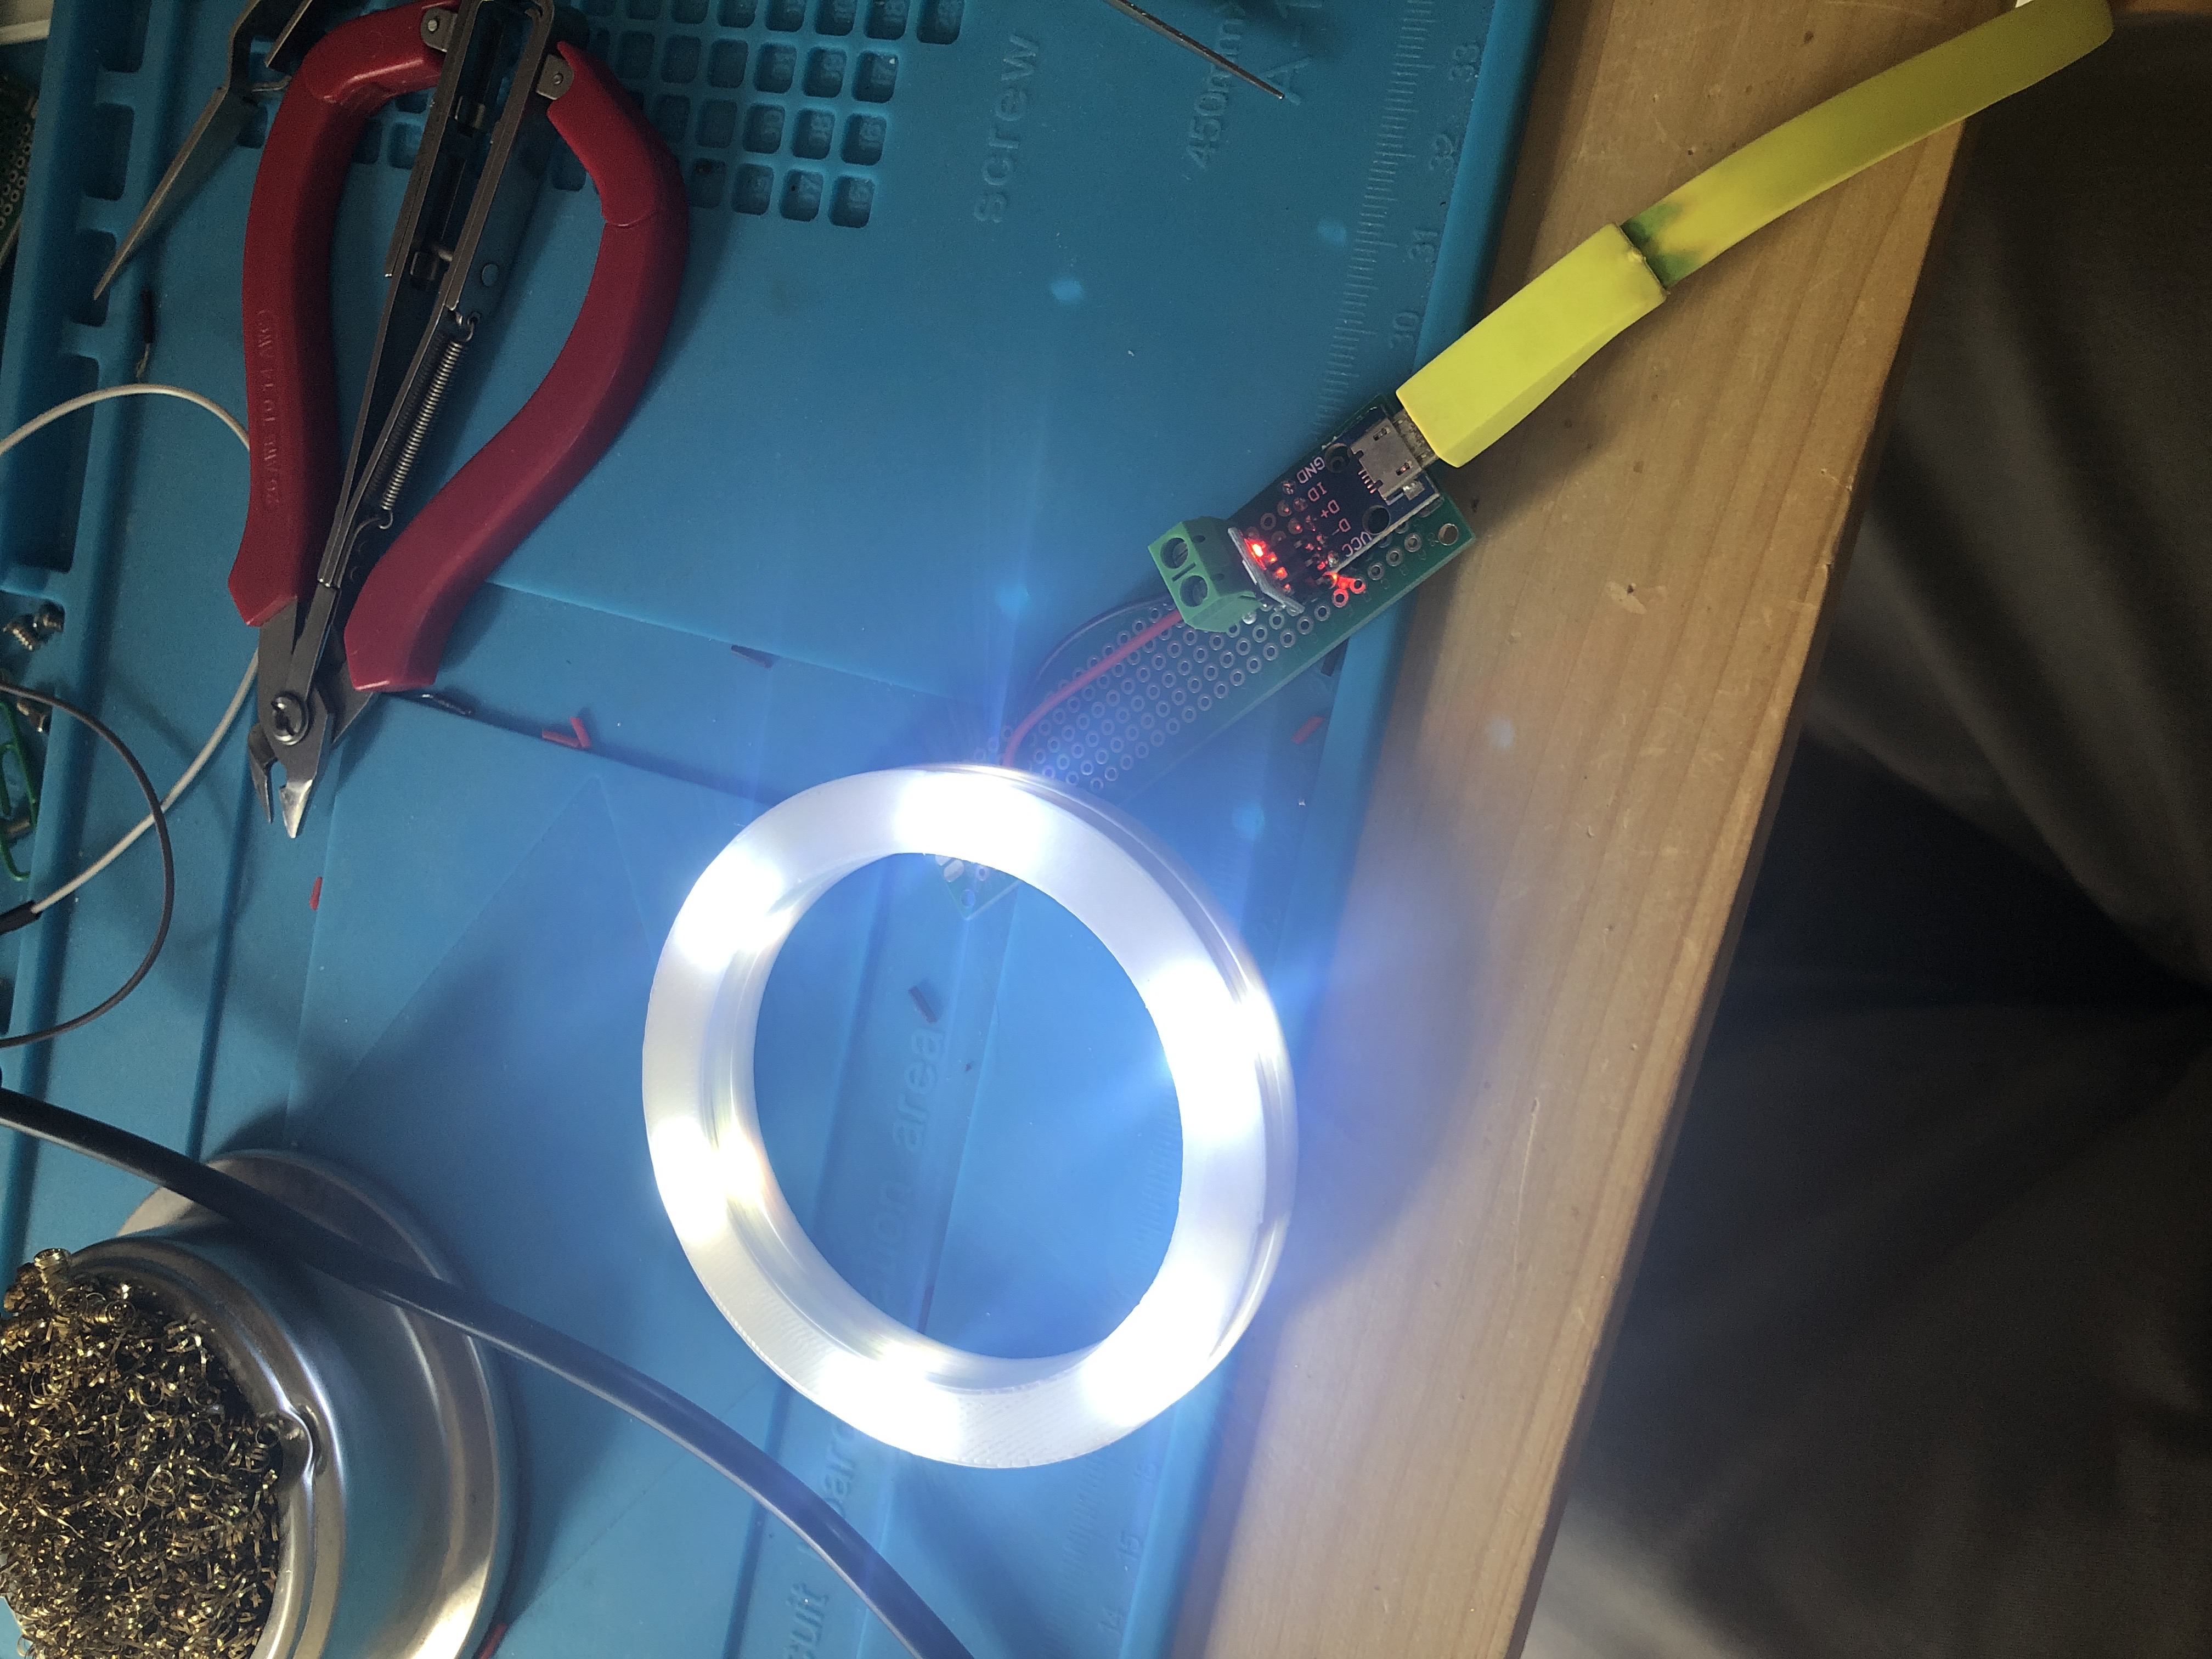
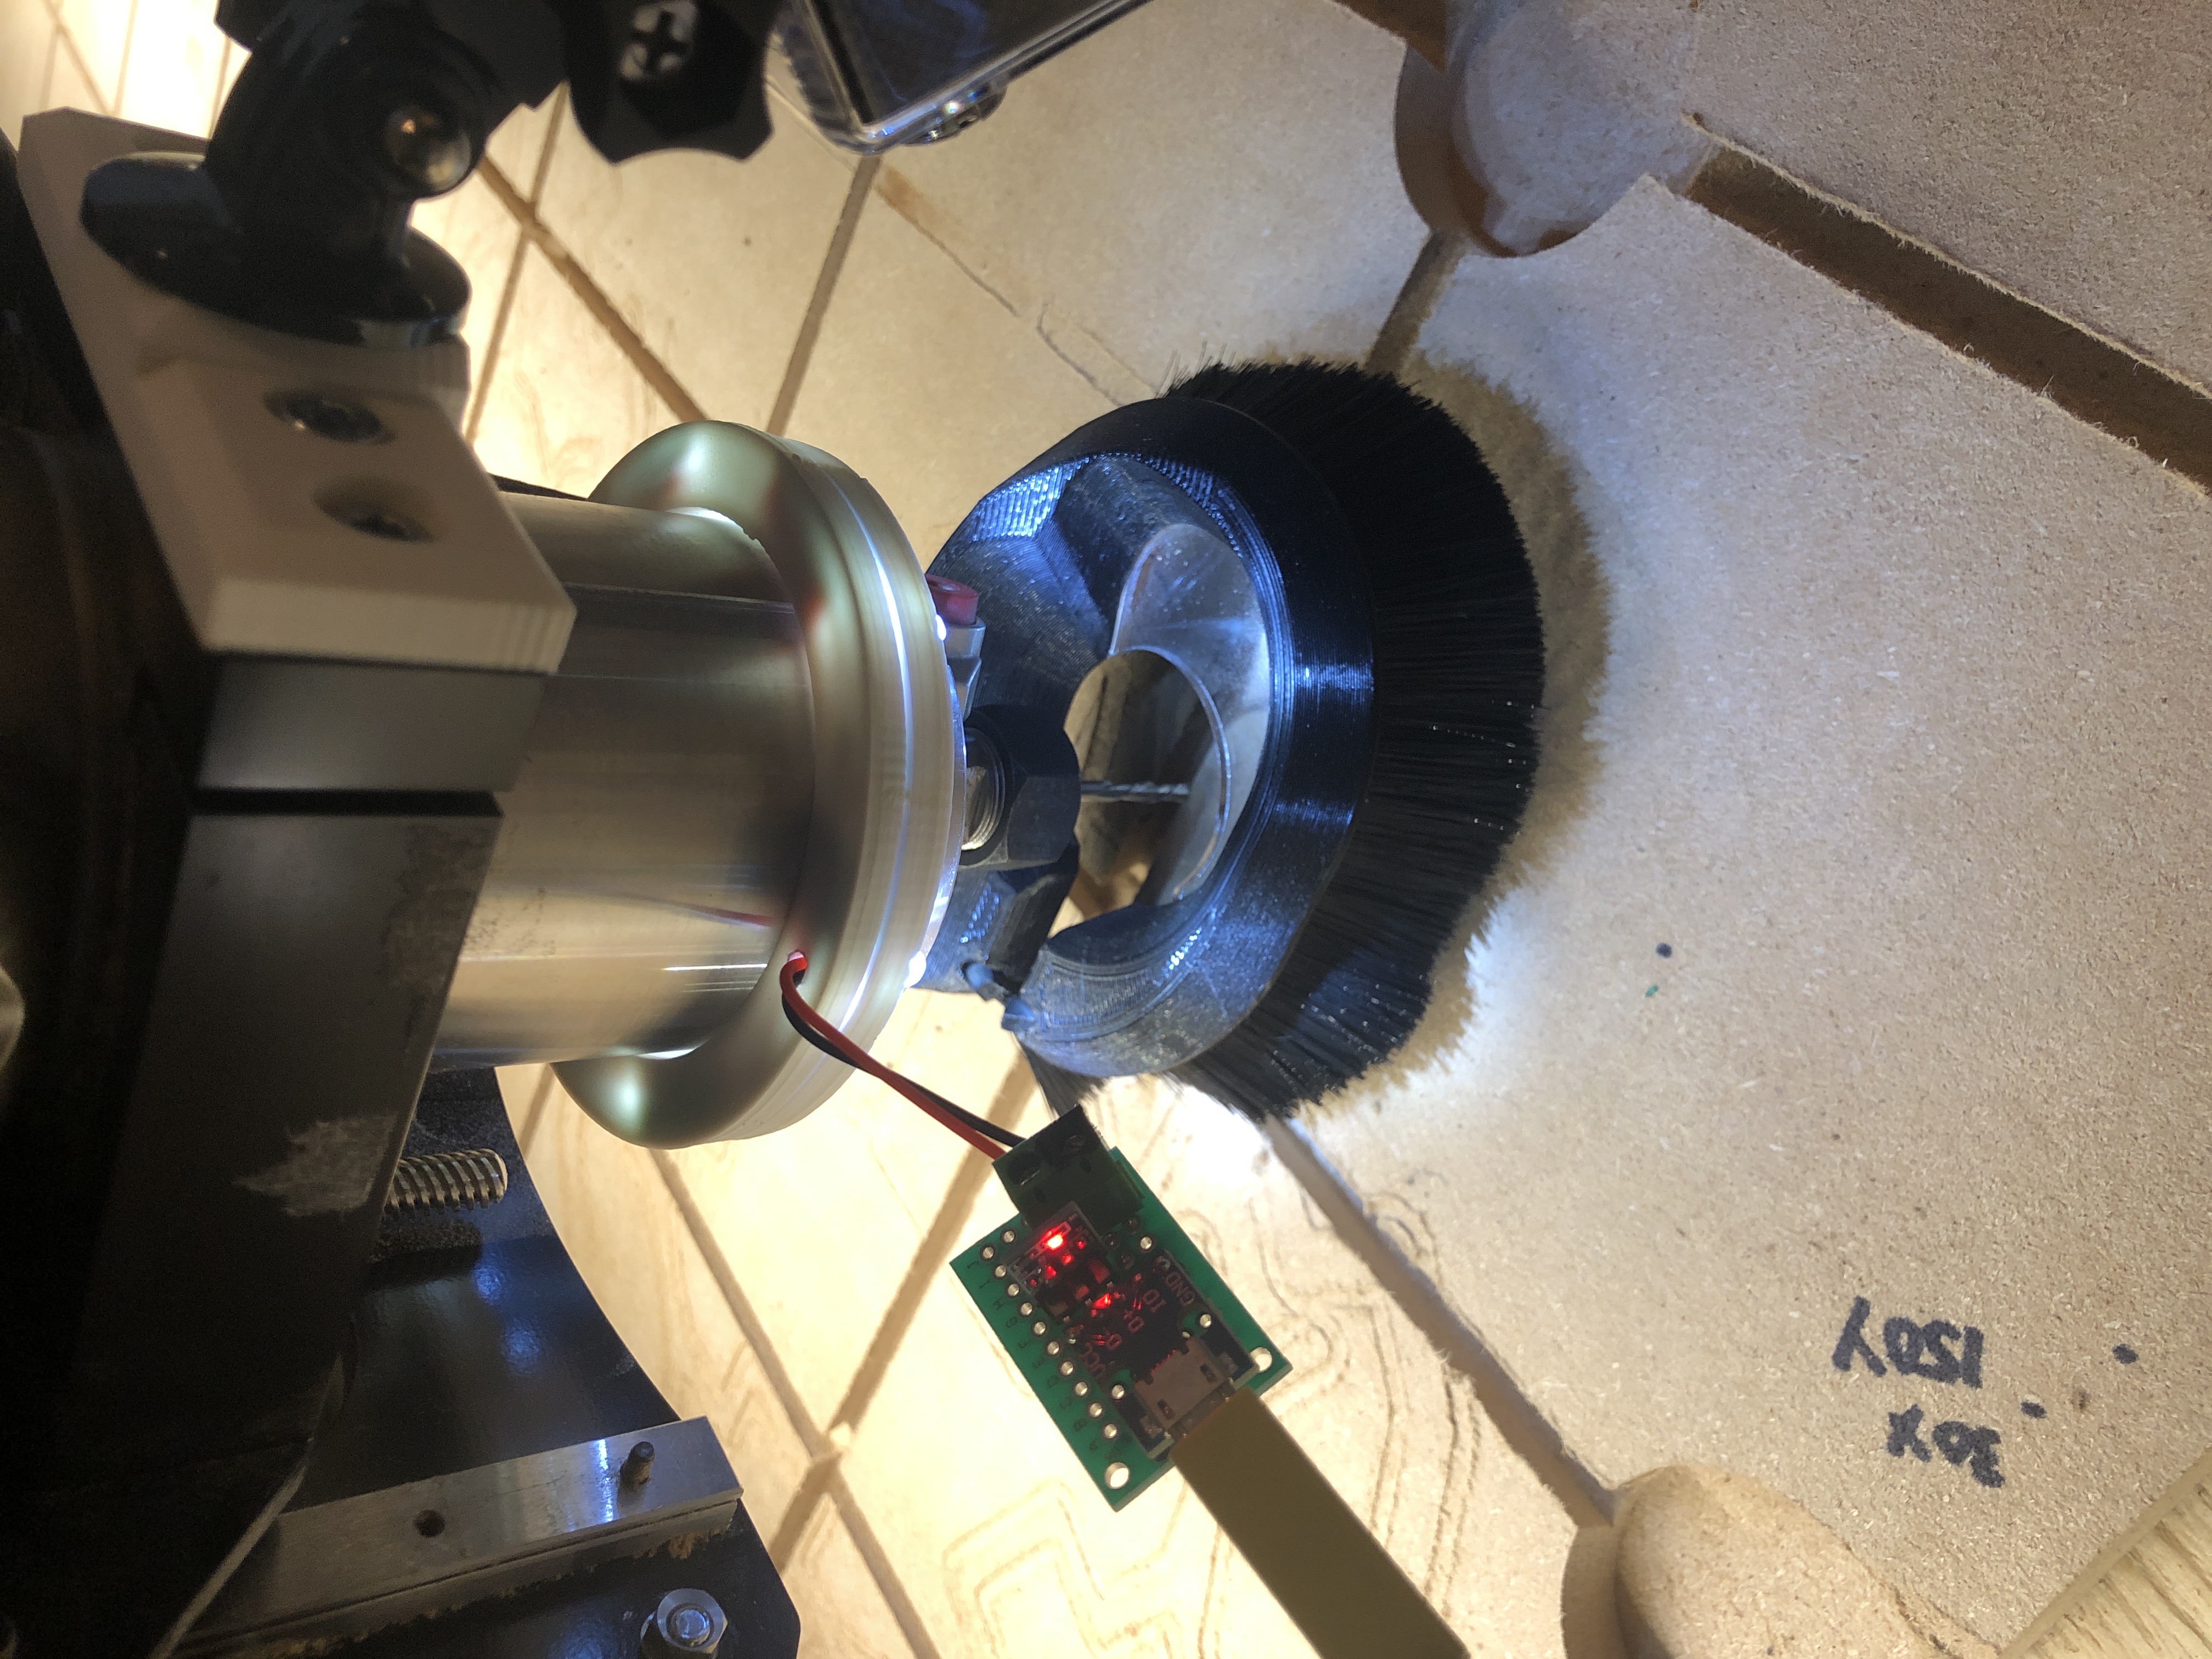
Another thing and this is because I want to record jobs, is that I needed extra light in the dust shoe section, So I designed using Freecad and 3D printed a piece, soldered White LEDs and a small USB powered thingy.
Used a USB extension as well to plug everything together. and voila ! More lights !
It improved a bunch and now I’m excited to test the next job with this !
Lighting Setup
Camera and POV
I chose to go with the cheapest method… Amazon … and a Akaso EK7000 Pro, and yes this is cheap.
It works for what I want to do. POV video with relaxing music, and showing the machine parameters and the end results. Nothing fancy at all.
Again if you have a budget, Sadly Go pro looks better (I never owned a go pro, I only watched comparable reviews, I am far from being expert in anything.)
So another awesome thing with sienci. The parts are documented and also the measurements !
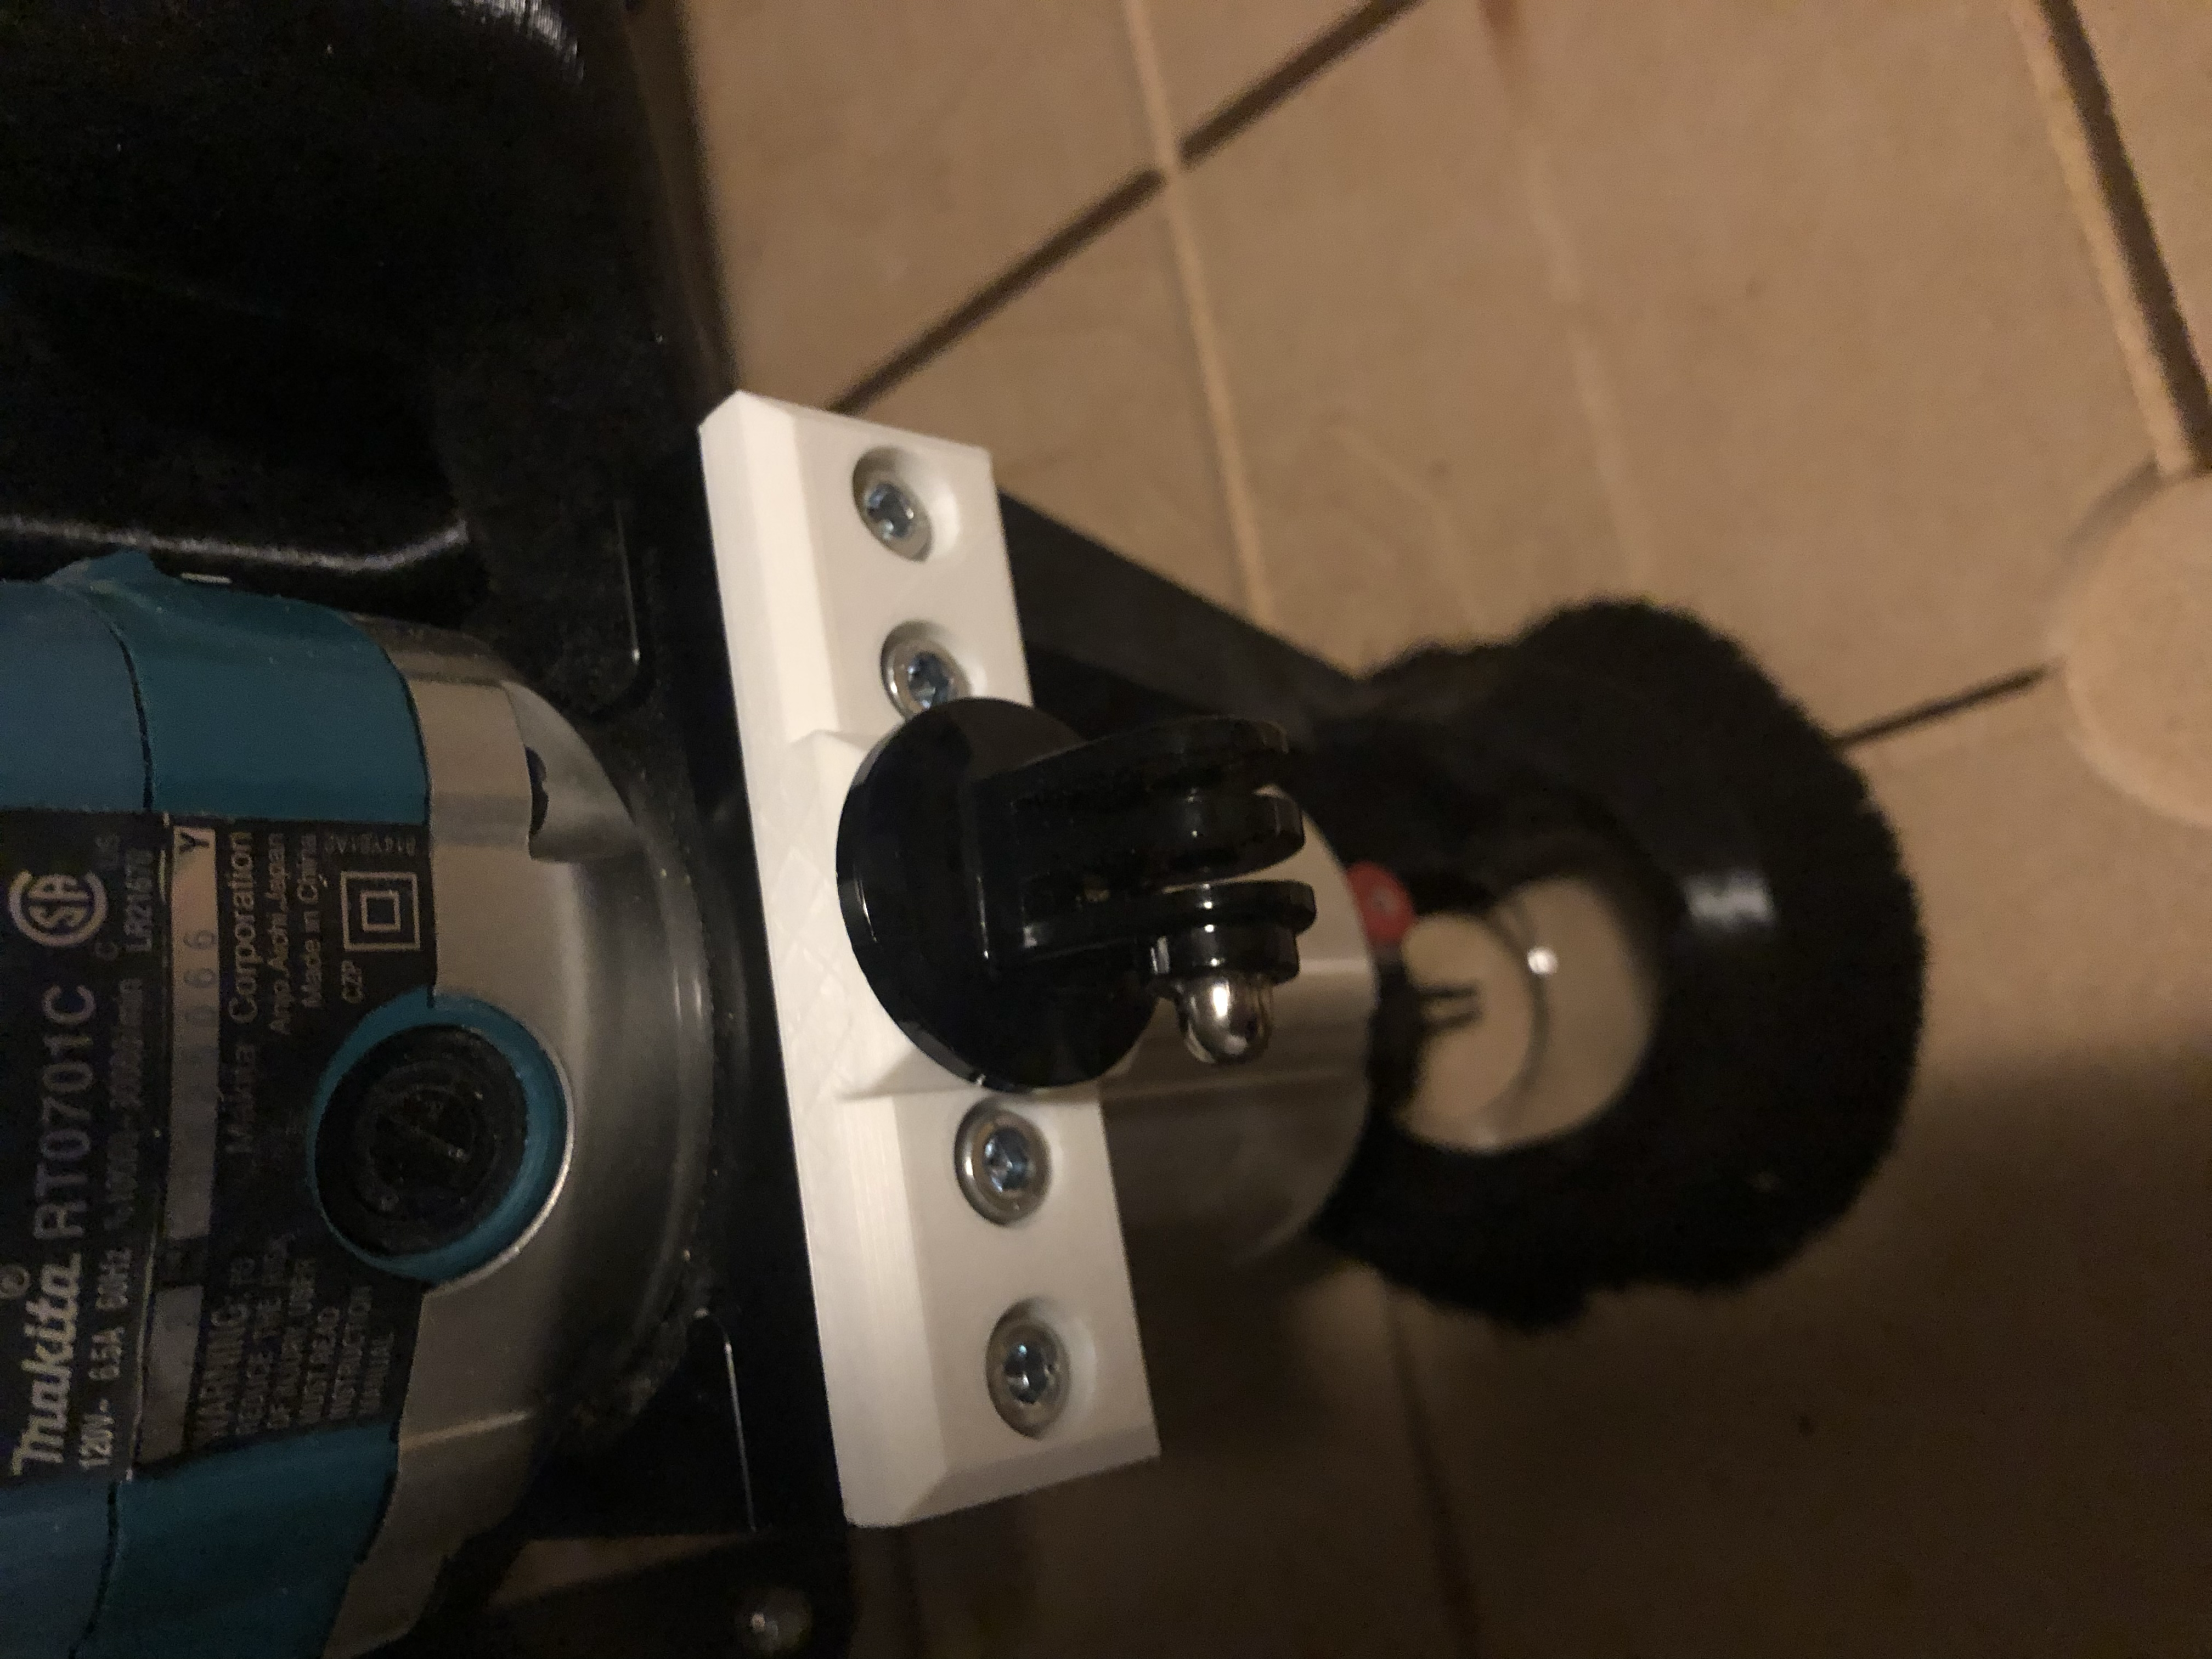
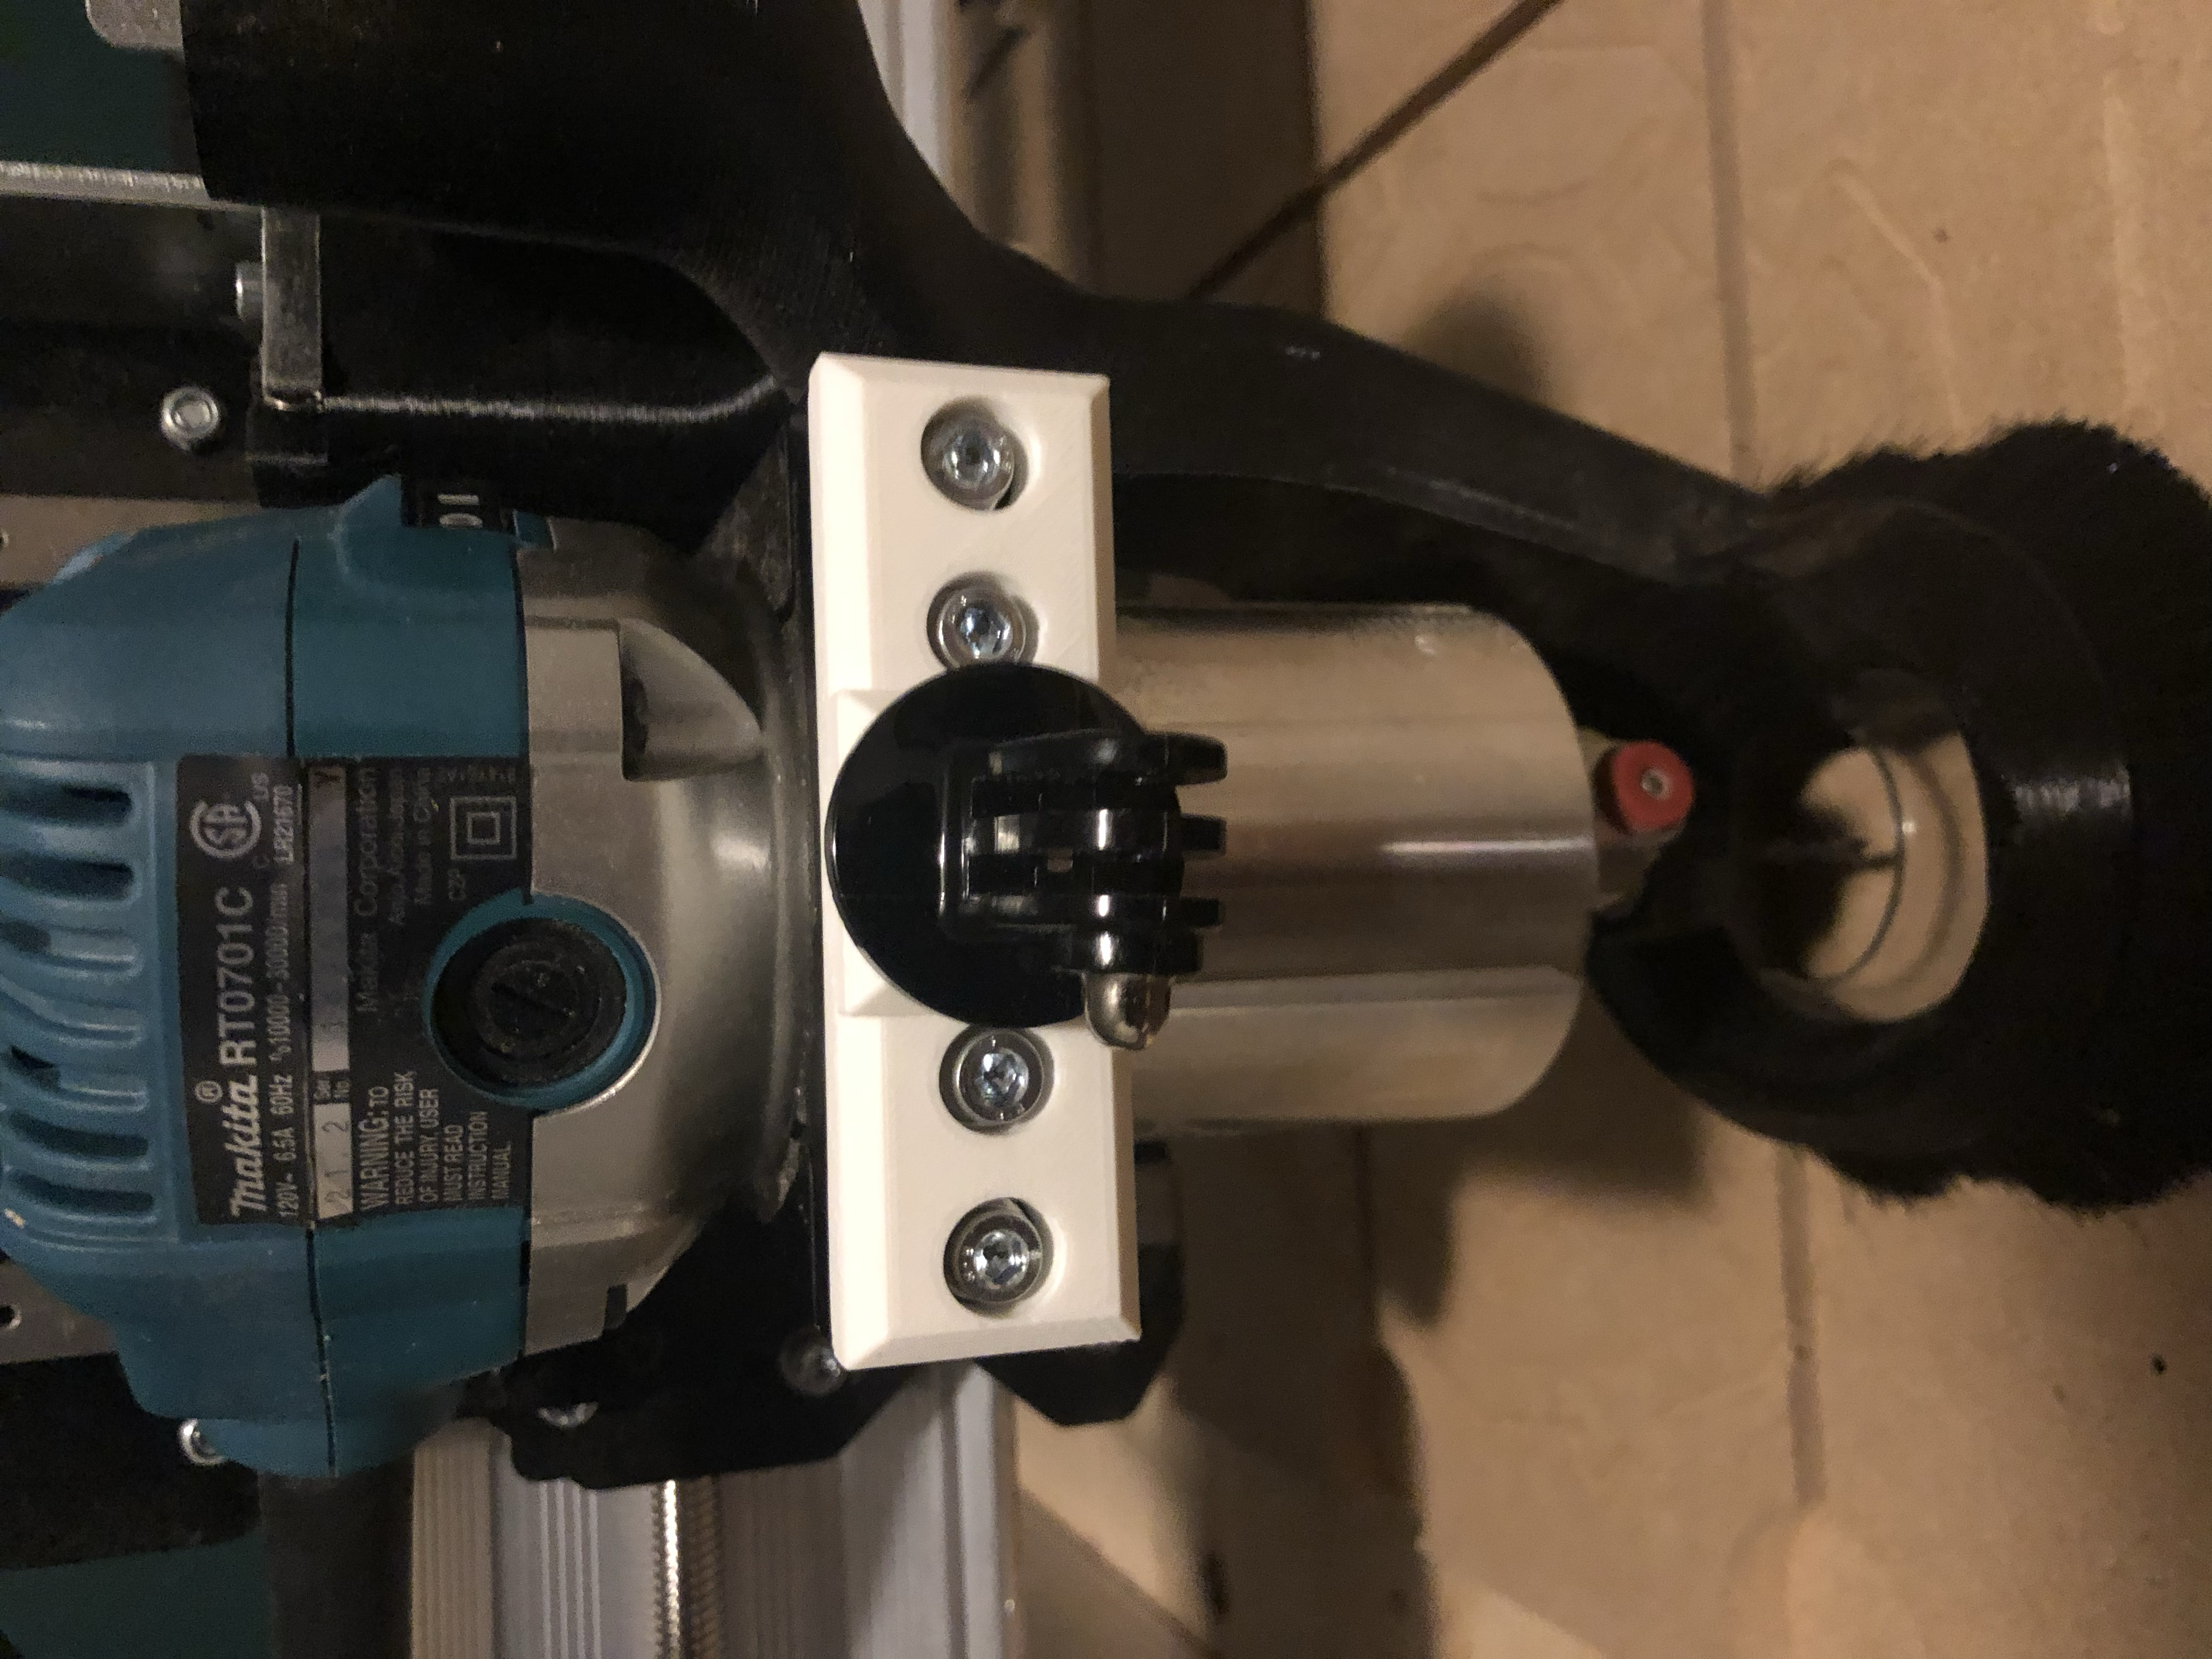
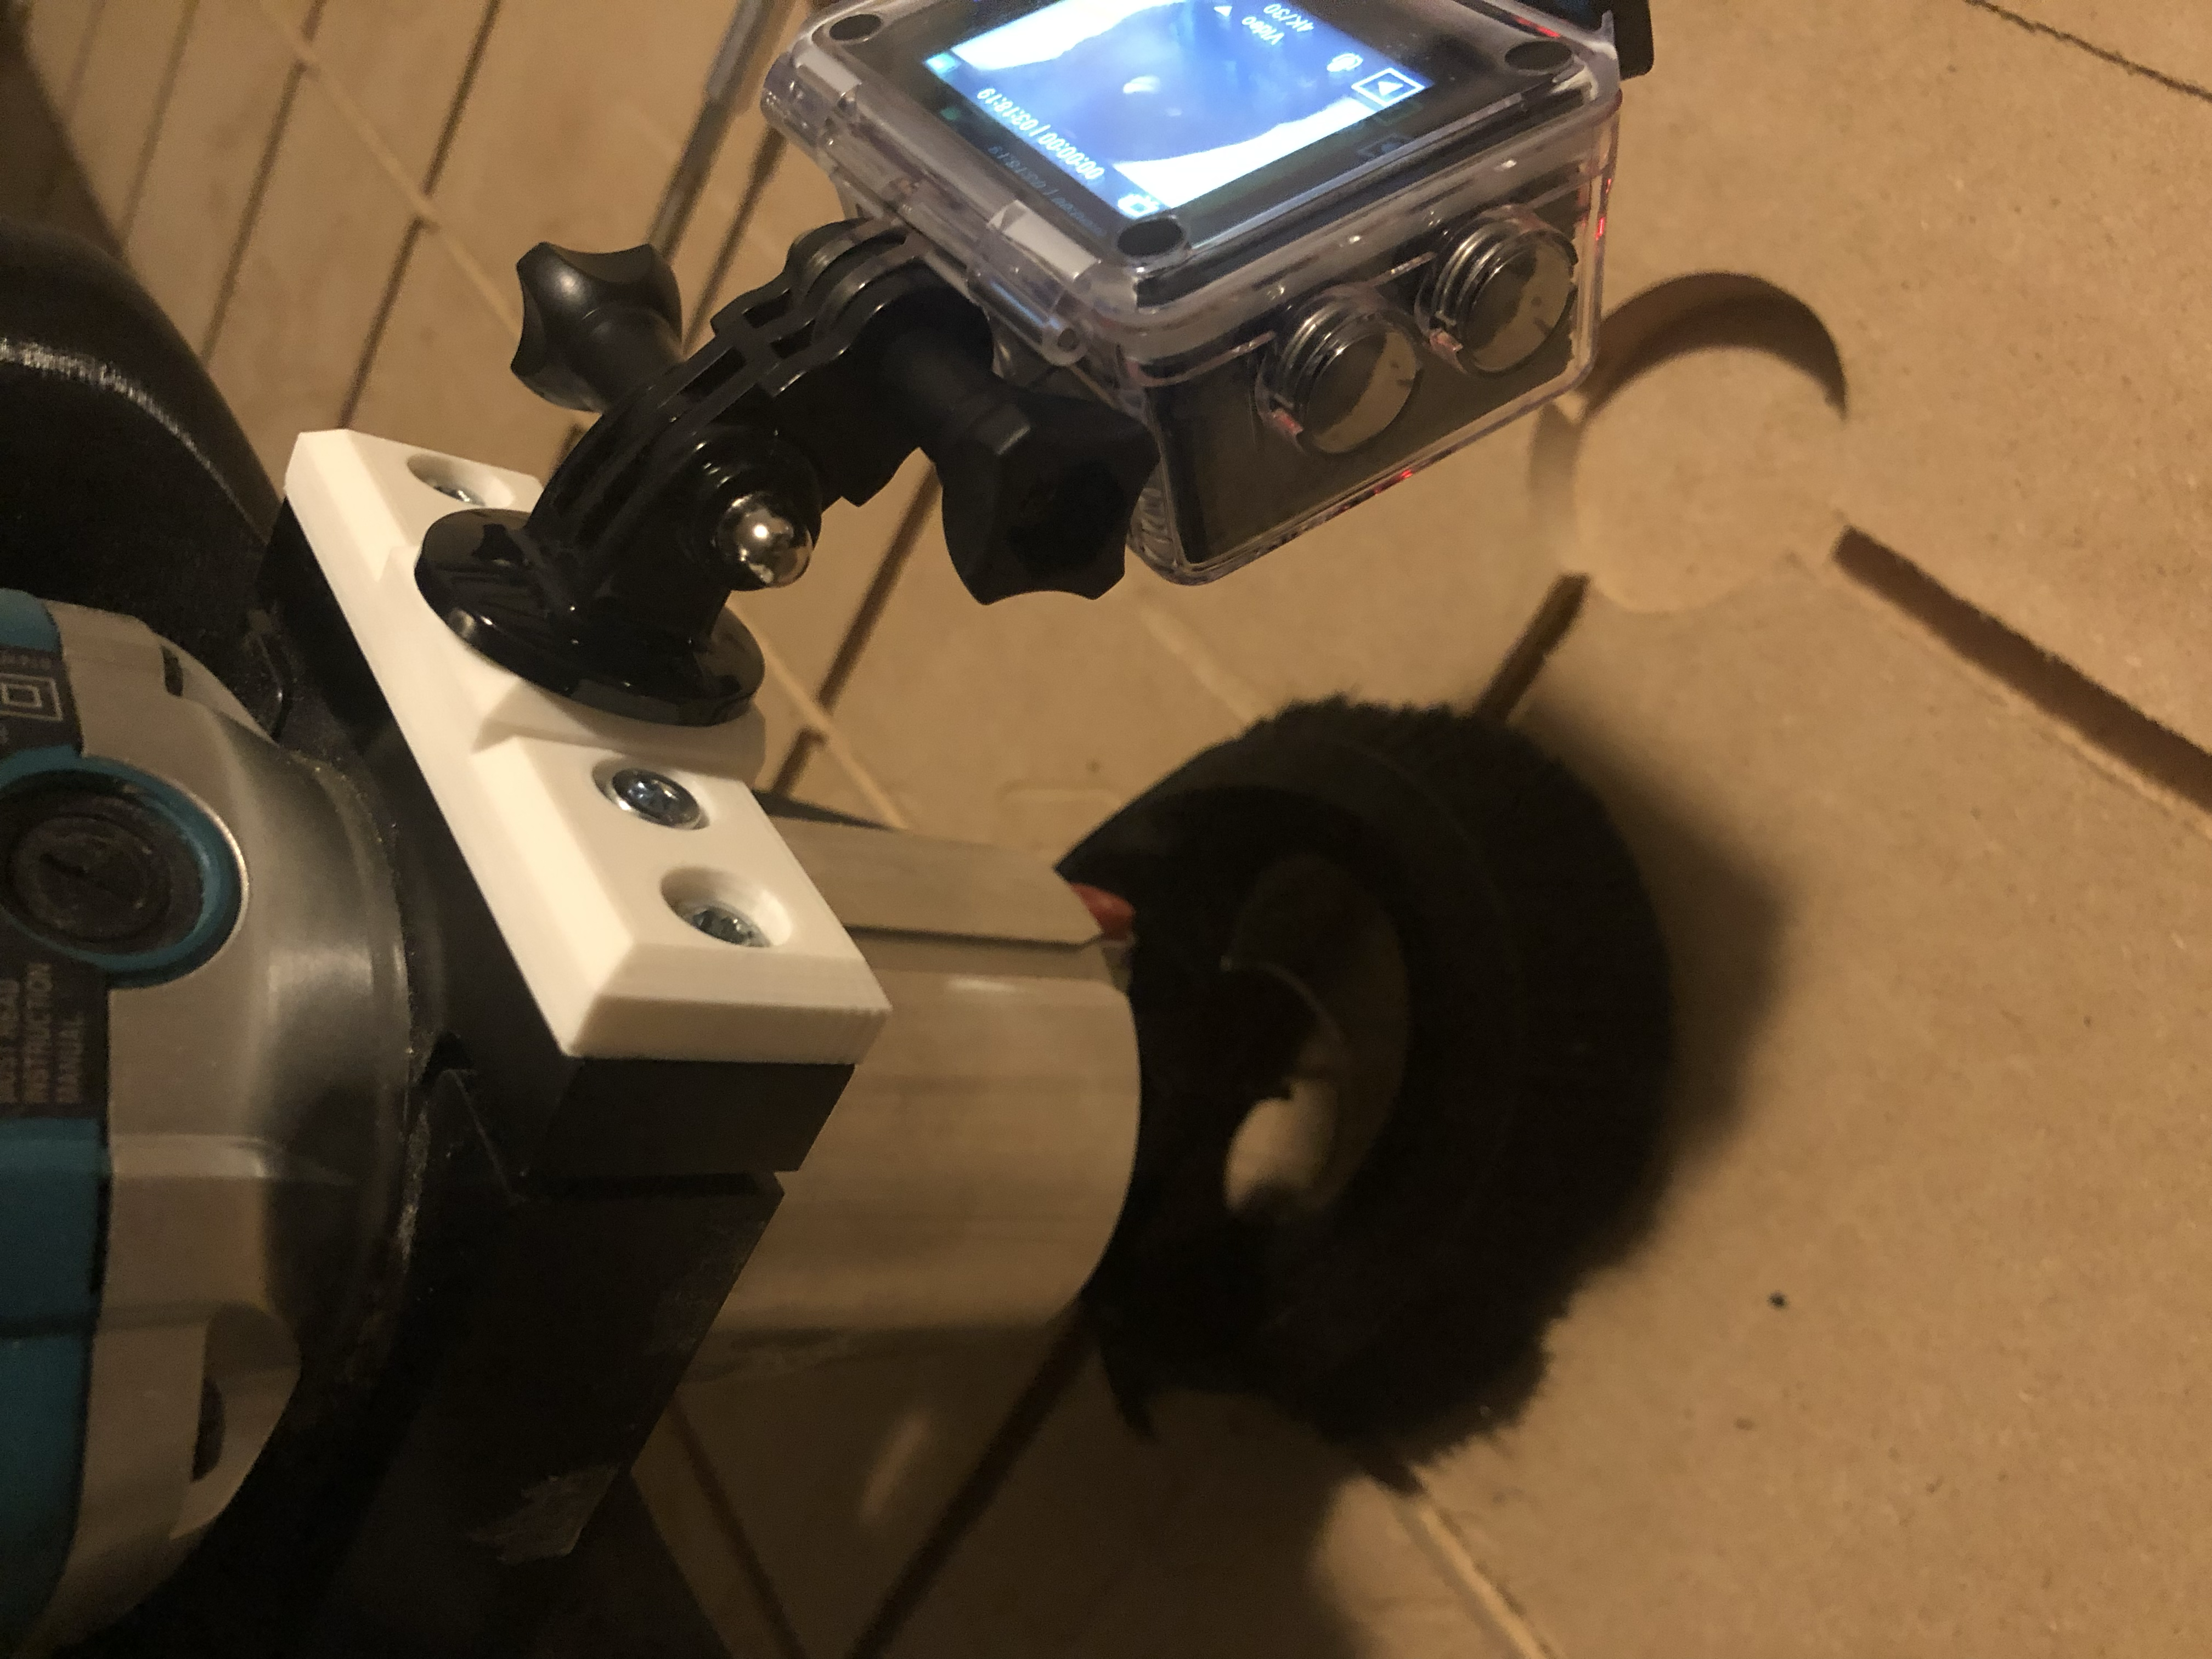
So I wanted to attach the camera in the front, I was able to quickly design using freecad and my 3D printer a piece that is mounted and screwed using the 2x M5-10mm screws (that were left to attach a laser or something like that, I think) in the front of the 65mm router mount piece.
I have the STL File and a bit more information on my etsy page: Camera Holder for 65mm router mount
It worked good !
Camera Holder Pictures
Dust collector-ish
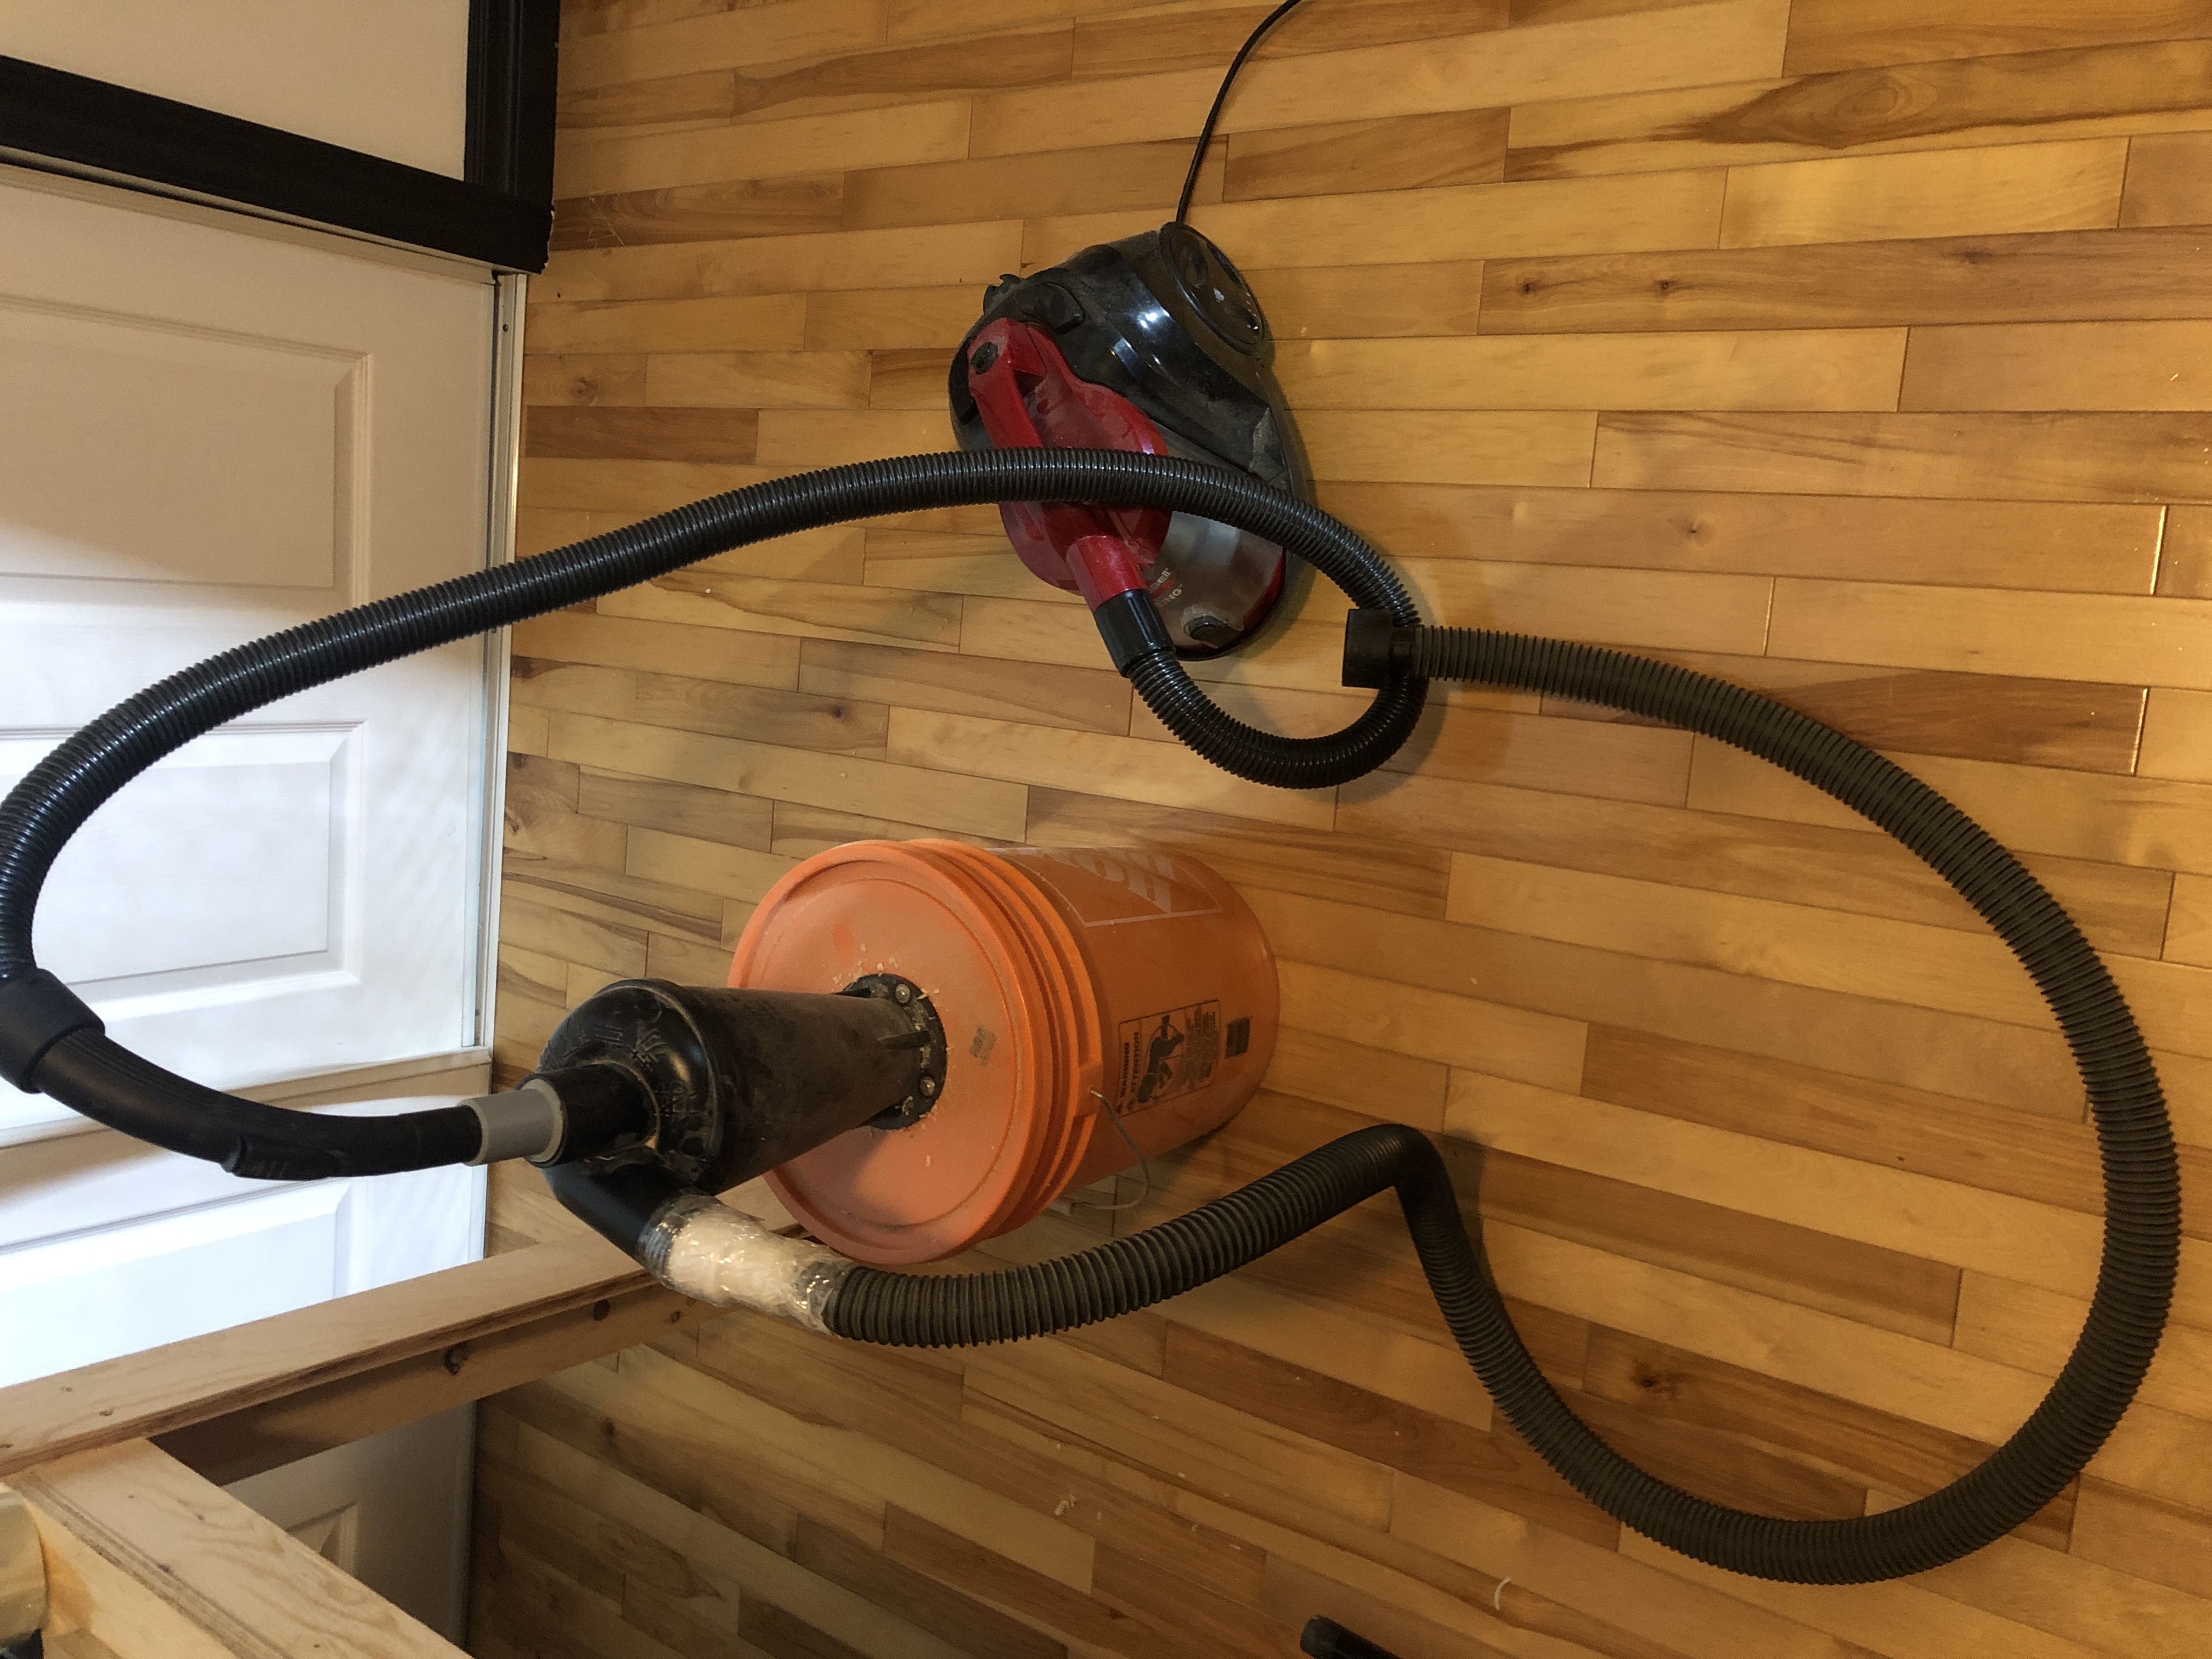
I had a old Vacuum (a household thing…), an orange bucket and a cyclone…
I simply connected all of these things together and unexpectedly… It worked, it isn’t perfect. But for a Free setup I’m happy… I’m still looking to get a real dust extractor / collector system, but yet again. The budget.
I do not recommend that setup at all, on youtube there is 1000x better solution. And yes I do own a shopvac, but the noise … So :/
Ugly dust collector-ish setup
Part 3
Softwares, Softwares and more Sofwares
I’ll be quick.
- Fusion 360 : Use it if you have the money to pay for the license (it has a 30% sales once every year, I can be wrong tho.)
- I don’t have the money nor the justification to buy it… So I can’t use it. (Not a fan of this pricing model. I prefer perpetual license.)
- FreeCAD : It requires patience, but if you have experience with fusion, the switch isn’t that hard. I still have to figure out the CAM Workbench, but the Part design and sketch work like a charm, again youtube is full of useful information and great tutorials.
- Inkscape : This is the software I use the most, when the design is not something that requires parametric stuff, I simply use inkscape.
- Carbide create V6 : Why an older version ? Because it lets you use the Save GCode … Yes I strongly think that I will buy the perpetual license of that software, I do not create anything complex and the price is like the lowest. In regards of which CAM software to use or even buy. I can’t help you, I watched a lot of videos and they all have pros and cons (my main blocker to use better one is that they don’t work on MacOS … and the price for sure !)
- iCloud : This one is completely optional, but I do have a older mac that act has a controller (yes gSender works great on it ! in the past I was using CNCJS with a raspbery pi, and someday I’ll bring back that raspberry, because I think that gSender is compatible 🤔). Why cloud storage ? I can draw and setup everything on
Windows and/orMac push that in the cloud and access it directly and quickly from other machines. - File and directory structure : After a bunch of project and ideas, you will notice that it become hard to find what job worked, which one didn’t and what stock is required or even what bit… So I think it is very important to establish a logical structure to classify and track projects. The main reason is : CNC allows repeatability, but to achieve that you need to document and sort your sources. (see at the bottom of this article, I shared the structure that I’ve started to use) and yes document your progression, your good and bad results, and implement some sort of FAQ, you will become better and faster.
- Shotcut : I started to use that one for few days now, it works great for my video editing pipeline. This is simple and I wanted something to create simple videos.
- gSender : Still learning how it works, but I kinda like it, the only thing that I don’t like (or didn’t find how to…) is how to lock the preview in top view mode ?? The working surface is quite big so it is always weird to navigate (and no, I do not have or use a mouse… I dont like mouse… I prefer CLI in general, but that’s another story…)
Conclusion
Cost, I can simply say, it costs money yes. Do not hesitate to buy good quality accessories, it makes all the difference at the end ! Other than that the fees and stuff you need around the machine itself has different price range. So these things are to keep in mind.
I’m so happy to have chose to go with sienci ! It works perfectly for what I do, I’m a hobbyist who likes to try stuff and experiment quickly and this machine has all the capabilities to scale and build awesome stuff !
If you are new to this world, There is plenty of information online, youtube is full of it ! The sienci website has a resource section with everything you need to know about how to operate your machine. Yes you will break bits, yes you will destroy project. But where would be the fun without those experiments ?!
I hope I bring some relevant information in this article and yes I do recommend the Sienci Longmill Mk2 machine !
I wish you fun and happiness building awesome stuffs !
All my projects are here : https://www.pinterest.ca/tgingras/my-projects/ My Etsy Shop is here : https://www.etsy.com/ca/shop/StudioWebux
Thanks for your support !
Extras
File and Directory Structure
Project_name/
    documentation.md
    base.svg
    Ideas/
        *.png
    Model identifier/
        Version/
            WORK/
                reference.png
                project_name.svg
                project_name.c2d
            NC/
                stock_tickness/
                    stock_size/
                        step_bitSize_workLocation_time_stockThickness_stockSize_description.nc
                        summary.md
            SVG/
            Photos/
            DXF/
            STL/
            Deprecated/
            Production/
                SVG.zip
                STL.zip
                DXF.zip